Collecting a variety of data is important for AI model generalization. A good dataset consists of objects with different perspectives, backgrounds, colors, and sometimes obstructed views. The model should learn how to handle outliers or unseen scenarios. This makes the data collection and labeling process hard.
In this post, we showcase sim2real capabilities of NVIDIA Isaac Sim for the collision avoidance task on NVIDIA JetBot. Sim2real makes data collection easier using the domain randomization technique. It expedites model training without access to the physical environment. However, in sim2real, simulation accuracy is important for decreasing the gap between simulation and reality.
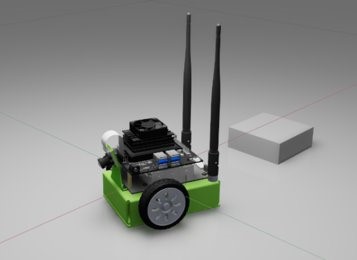
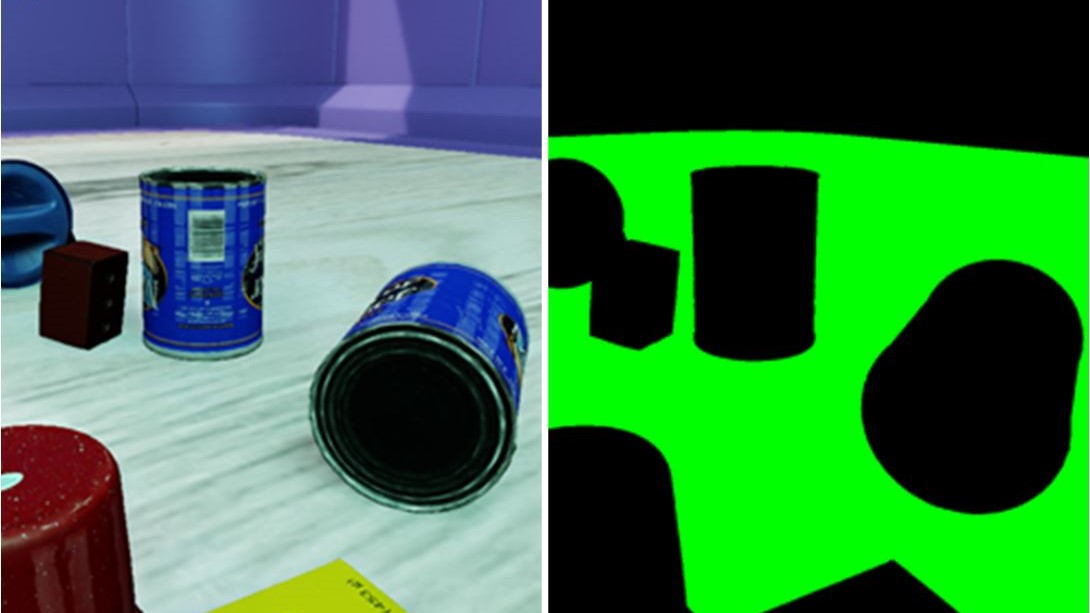
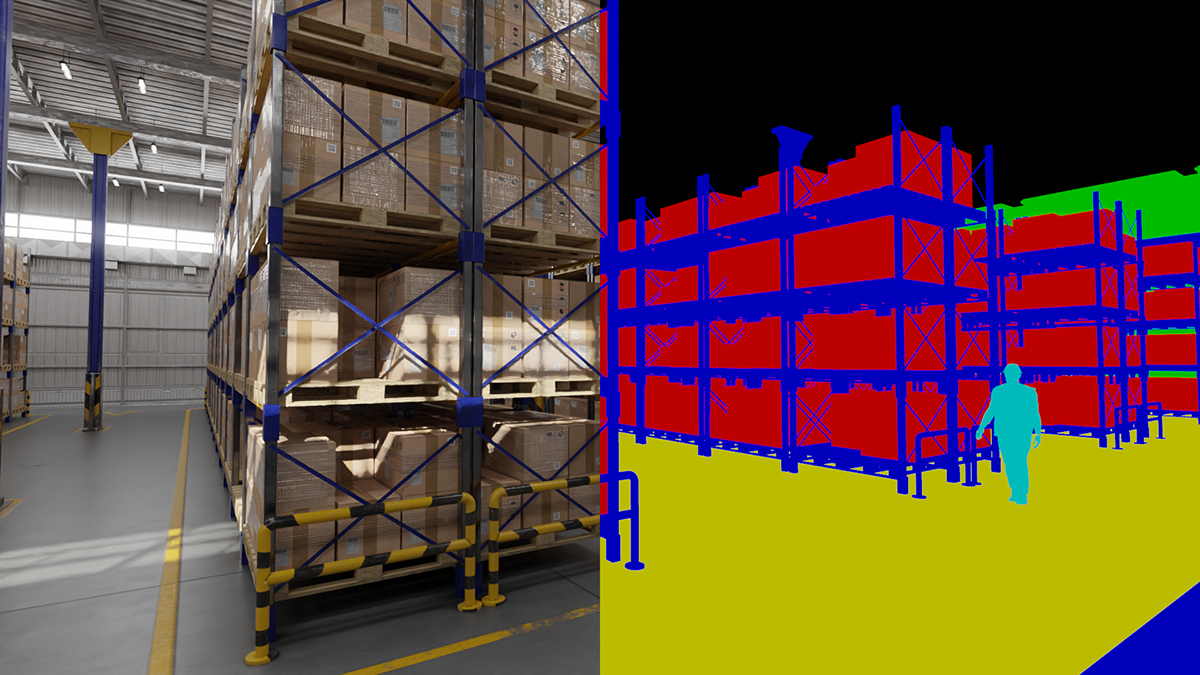
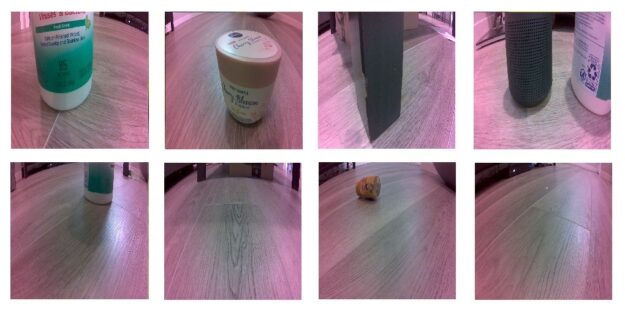
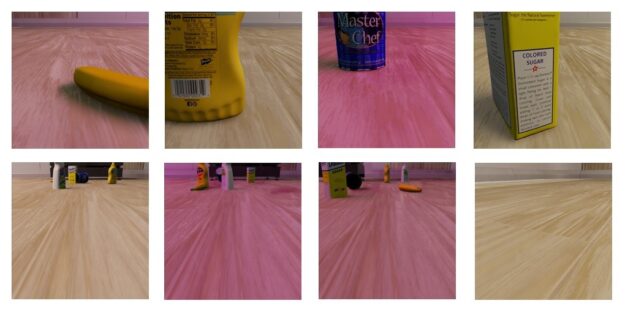
In JetBot, the collision avoidance task is performed using binary classification. In other words, you show model images that are considered blocked (collision) and free (no-collision). The following example images are from a real-world Waveshare JetBot perspective (Figure 2) and Isaac Sim (Figure 3) for collecting blocked and free data.
Using Isaac Sim for training collision avoidance
Here are the detailed steps to collect data using Isaac Sim on the Waveshare JetBot:
- Import the JetBot and move it into the simulation.
- Import objects and the JetBot to a simple indoor room.
- Use Domain Randomization and the Synthetic Data Recorder.
Importing the JetBot and moving it in simulation
Install Isaac Sim 2020.2. For more information, see System Requirements.
To run Isaac Sim Local Workstation, launch /.isaac-sim.sh to run Isaac Sim in the regular mode. There is an option to run in headless mode as well, for which you must download the client on your local workstation [LINK].
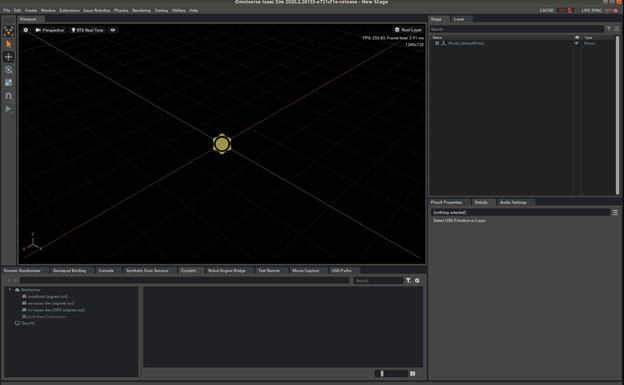
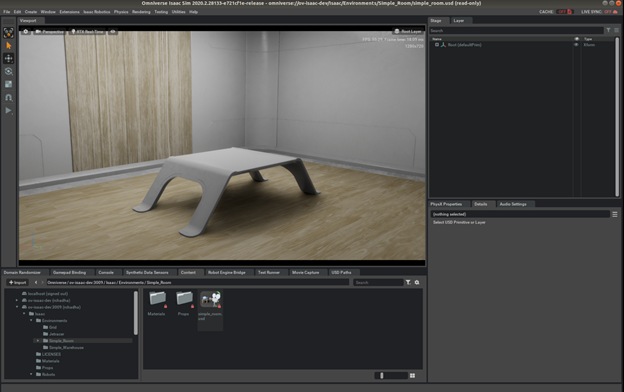
When you launch the script, you should see the startup window with the following resources (Figure 4):
- Top left—Viewport from which to visualize the stage or scene in simulation.
- Top right—The Objects, Physics, and other details related to the simulation.
- Bottom left—Access the samples pre-installed with Omniverse:
omniverse://ov-isaac-dev/Isaac/Robots/Jetbot/.
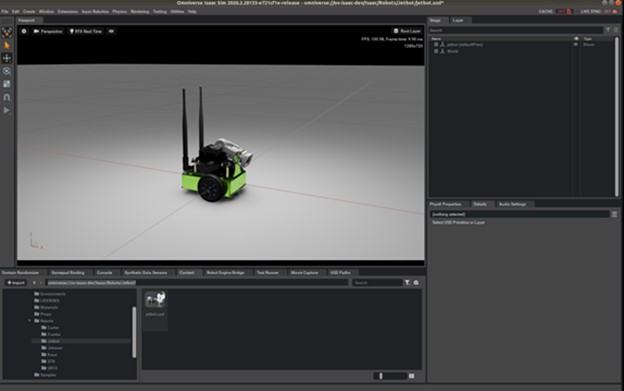
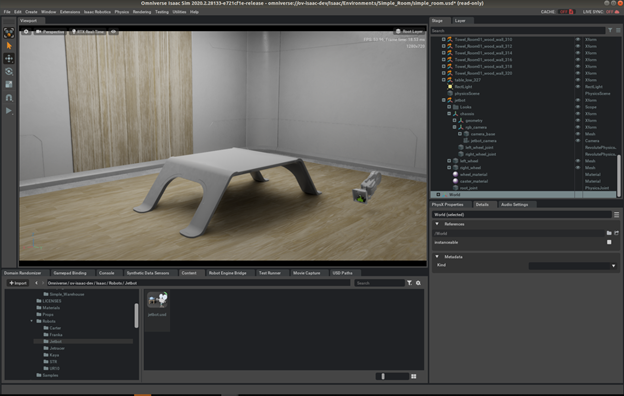
To open a JetBot sample, right-click the jetbot.usd file. You see that the stage now consists of the Jetbot and the world (Figure 5). The world further consists of a Physics scene with a staticPlaneActor, which are both needed for the correct simulation of objects in the scene. We discuss these later in this post.
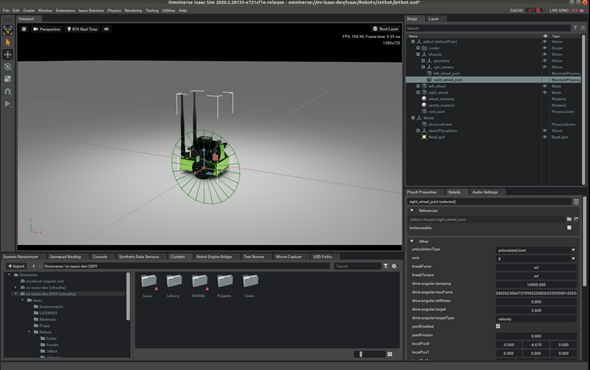
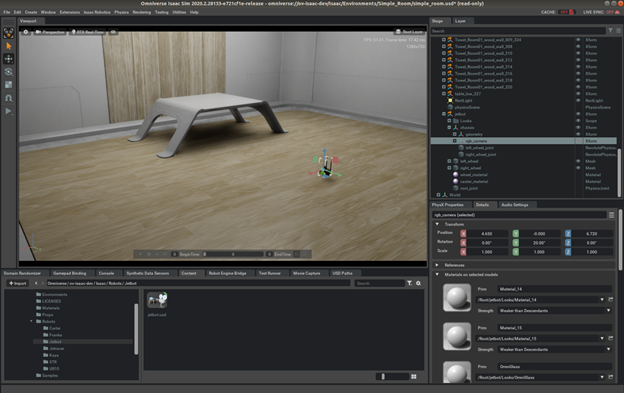
To move the Jetbot, change the angular velocity of one of the joints (left/right revolute joints). In Figure 6, the right wheel joint has been set to a target angular drive velocity of 2.6 rad/sec. When you choose Play, you should see the robot move in a circle.
Next, investigate importing the Jetbot into a simple indoor room where you collect the data to train the model.
Importing objects and the JetBot to a simple indoor room
To find simple_room.usd, navigate to omniverse://ov-isaac-dev/Isaac/Environments/Simple_Room/. Right-click and open this scene. Figure 7 shows a simple room example.
Add Physics to the scene by choosing Physics, Add Physics. Make sure that nothing is selected in the scene on the right; otherwise, Physics may be incorrectly added for the scene.
Select towel_room_floor_bottom_218 and choose Physics, Set, Collider. This makes the floor the collider or ground plane for objects in the scene. When simulation begins, objects treat this as the ground plane.
Import the JetBot into this room by navigating to omniverse://ov-isaac-dev/Isaac/Robots/Jetbot/ and dragging the jetbot.usd file into the scene. It may take some time or several attempts. When you choose Play, you should be able to see the JetBot drop onto the surface. If you get warnings similar to “physics scene not found”, make sure that you have followed the previous steps correctly.
If you do not want the camera of the JetBot to be visible on the Viewport, choose Stage, JetBot, rgb_camera and then select the ‘eye’ icon to disable the Omniverse visualization for the camera.
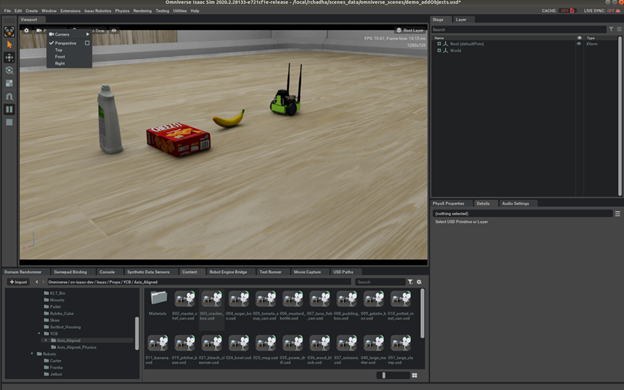
To add more objects into the scene, navigate to omniverse://ov-isaac-dev/Isaac/Props/YCB/Axis_Aligned, which contains a few common everyday objects from the YCB dataset. Drag and drop objects from the options available. After you drag a particular object into the scene, make sure that you select Physics, Physics, Set, and Rigid Body. This ensures that the object behaves properly after the simulation has started.
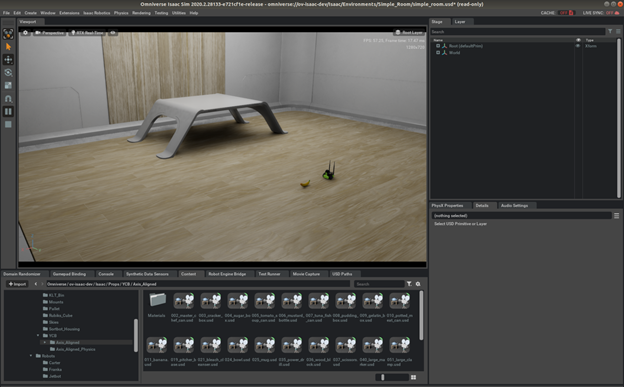
Following the same procedure, drag and drop more objects in the scene. Figure 10 shows more objects in the scene.
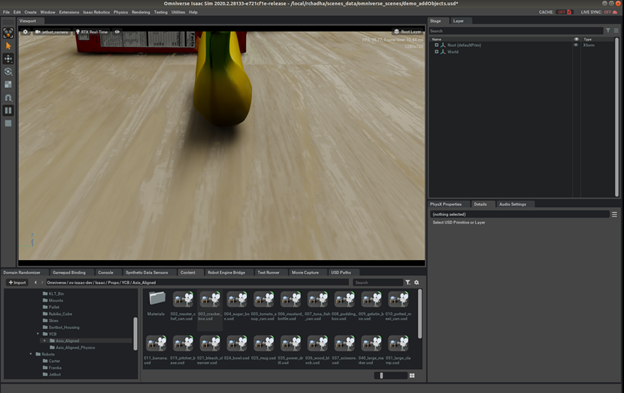
You can also look at the objects from the JetBot camera view. To do this, below the Viewport, change Perspective to Camera, jetbot_camera. This is the view for gathering data. However, the resolution for the Viewport must be changed to match the actual camera of the JetBot in the real world. To do this, below the Viewport, select the gear icon and set the resolution to 1024×1024. The aspect ratio must be 1:1.
The corresponding view of the JetBot changes as well. You should be able to see more background details come into the picture. This is how the actual JetBot looks at the world.

Using domain randomization and the Synthetic Data Recorder
While capturing data, make sure that you cover a variety of scenarios, as the locations, sizes, colors, and lighting can keep changing in the environment for your objects of interest. Add a domain randomization component to make the model more robust and adaptable. This ensures that you have good generalization to the real- world data as well.
For this example, I set the position of the JetBot to X = 0, Y = 0, Z = 23. You can move the table out of that position, or you are free to select a position of your choice for the JetBot. The initial object, the banana, is kept at X = 37, Y = 0, Z = 22.
Choose Create, Isaac, DR, Movement Component. Make sure that no object is selected while you add this DR; otherwise, there may be unpredictable behavior.
Now choose Windows, Isaac, Relationship Editor. This open a tab in the bottom right, to the right of Details, Audio Settings.
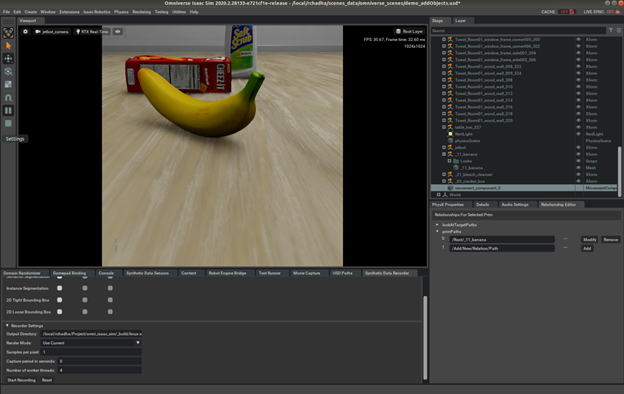
In Stage under Root, there should now be a movement_component_0 created towards the end. Select the Relationship Editor in the tabs below and select primPaths. Add the object to randomize. For this case, select the banana.
Add the path: Root/_11_banana. You must specify the range of movement for this DR component. On the Details tab, specify the X, Y, and Z range:
- X: 10 to 40
- Y: -10 to 10
- Z: 20 to 20
After making these changes, choose Play and you see the banana move at a random location between your specified points. You have successfully added a Domain Randomization Movement component for a banana. The data recorded in this simulation would be of the class Collision/Blocked. This is because the banana is close to the JetBot and could result in a collision with it.
By changing the range of the X component for movement randomization, you can gather data for the Free/No-collision class as well. In this case, there would be no object within 40cm of the JetBot. The objects beyond the range of 40cm do not cause a collision with the JetBot so you can add randomization for them. Similarly, you can add randomization for scale, color, and lighting for the objects needed.
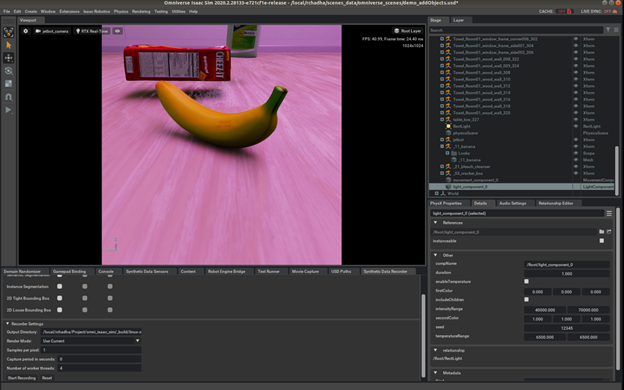
In the Waveshare JetBot, there is a pinkish tinge when using the actual camera. This can be accounted for as well. For this, choose Create, Isaac, DR, Light Component. In the Relationship Editor, specify the Path value of the light in the room. Now, the color and effects of lighting are randomized as well.
In conclusion, you can edit the range of values for the first and second color to ensure variation in lighting, as per your real-world scenario.
You can also record data from this simulation. To do so, choose Window, Isaac, and Synthetic Data Recorder. On the Synthetic Data Recorder tab, you can now specify the sensors to use while recording data. For this post, use RGB, as it is a classification problem in this case.
Set the output directory and the capture period in seconds to appropriate values, such as 0.7 for the capture period. After completing a recording, you should find a folder named /rgb in your output path which contains all the corresponding images. Create two separate folders for collision and no-collision and store the corresponding images stored there after applying different randomizations. You can now use these images to train a classification model and deploy it on the JetBot.
For next steps, check if JetBot is working as expected. After the dataset is collected using Isaac Sim, you can directly go to Step 2 – Train neural network.
Conclusion
In this post, we showed how you can use Isaac Sim with JetBot for the collision avoidance task. You used domain randomization for lighting glares and to perform background variations, taking advantage of the different objects available in Isaac Sim to create a dataset. You learned how to collect a dataset to build a generalized model such that it can work accurately on unseen scenarios.
For more information, see Getting Started with JetBot.